|
Prior to the development of deep hole drilling, most
barrels were made by forge welding a tube and reaming
it. (Brass barrels were core castings.) There are several ways to
weld a tube but the simplest and one most commonly found
on longrifle barrels is a single butt-welded seam
running lengthwise. That is what will be described in
this article.
The first step is to create a skelp from a bar of
wrought iron. The size of the skelp is dependant on the
size barrel but for a 46" rifle barrel 1 1/8 at the
breech it would be about 38" long, 4"wide and
tapering from 1/2 to 3/8 in thickness.
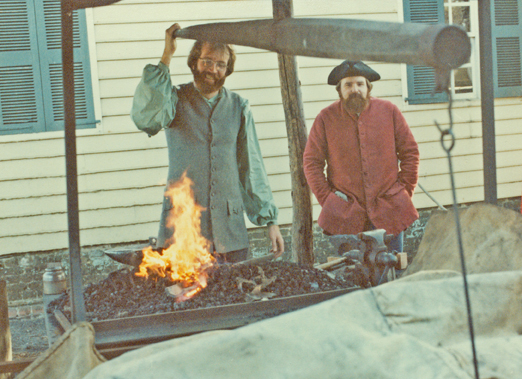
Barrel making demo for a Learning Weekend in
February, 1983
After forging in the desired taper the skelp if "fullered
up" (forged in a swage block with a top tool called a
fuller that is struck by a sledge) to produce a U shape
from end to end.
Beginning in the middle, edges of the skelp are forged
over until the contact each other in an area about 2
inches long. This contact area is heated red hot, so it
will melt the flux. Flux (can be borax or fine sand) is
spooned on both surfaces. The fluxed section is heated
to a welding heat (yellow-white hot with a slight shower
of sparks) and it is brought quickly from the fire to
the swage block. An assistant inserts the tapered tip of
a steel mandrel into the tube and quick hammer blows
fuse the edges together around the mandrel. The mandrel
is only in the barrel a few inches and not for more than
a minute so it doesn't usually stick -- if it hangs a
little it can be snatched out by catching the hooked
handle end on the edge of the anvil.
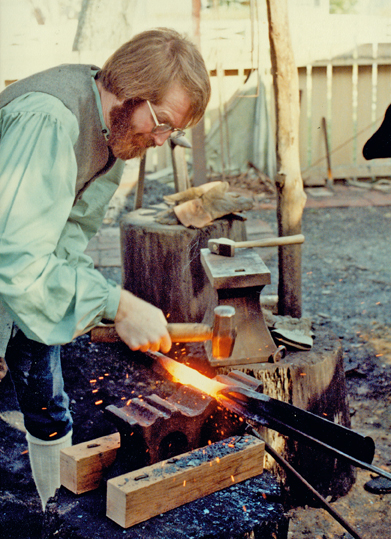
I usually run at least two welding heats on each section
and don't try to weld more than an inch or so at a time.
(Some period accounts imply that by using strikers with
sledge hammers a team on men could weld several inches
in one heat.) Welding is as much art as science and it
is important to learn the feel on the heat so you can
tell when the weld is sound. I found that getting a
round hole during the welding saved a lot of time
reaming so I began forging the tube down around a
smaller mandrel after the first welding heat.
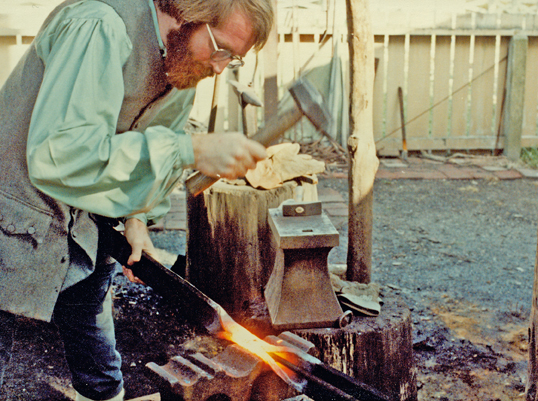
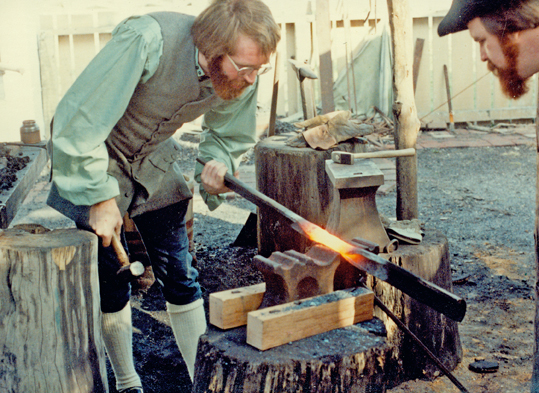
We pause to examine the weld before returning the barrel
to the fire.
I weld to one end then turn the barrel skelp end-for-end
and weld the other half. Since the skelp was tapered the
resulting tube is heaviest at the breach and has a
fairly even taper. I use a concave top swage to smooth
up the round tube and adjust the taper as needed to
remove any lumps. If a section is undersize to can be
enlarged by "jumping" (heating a section and striking
the end of the tube on the anvil to thicken the hot
part. The flare at the muzzle is also produced by
jumping.
After rounding up the tube it is examined for tight
spots. If there is any constriction of the bore at this
stage the round tube can be reamed with a couple of bits
before it is hammered octagon.
I first forge the octagon with a hand hammer at a bright
red heat. No swage block is involved in this step--just
the flat of the anvil. This is an opportunity to check
for welding flaws because they will show up as shadows
in the tube. Once the rough octagon is formed, the
octagon is refined with a tool called a
flatter. The flatter has a flat face about three inches
square and is struck by a sledge. Keeping the heat at a dull red
during this step will develop a
smooth surface and the corners will be sharper.
UPDATE: American Pioneer Video has
released a one hour and 25 minute video showing the
barrel forging process described here. Jon Laubach, his
son Chris, and Mike Miller are featured. See Jim
Wright's web site at
http://www.americanpioneervideo.com/ .
(top)
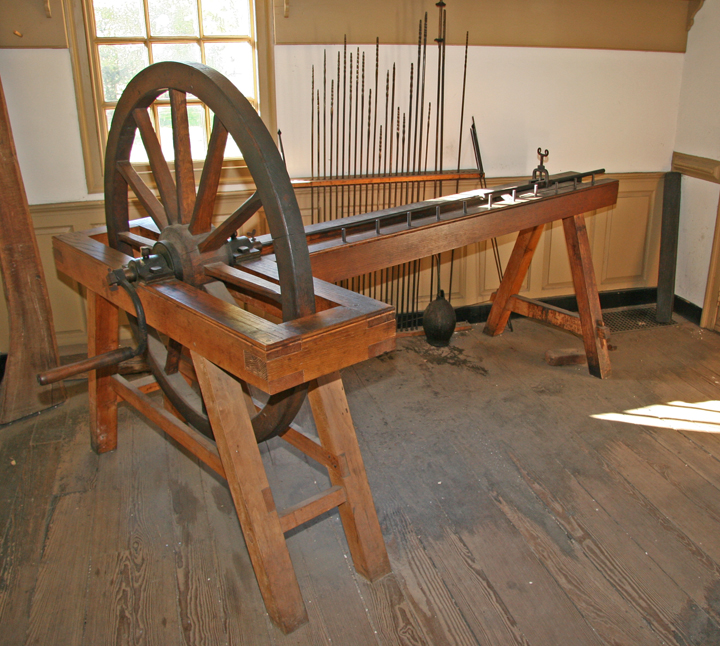
This barrel reaming machine was based loosely on
drawings in "The Gunmaker and the Gunstocker" by P.N.
Sprengel, Berlin, 1771 [translated and reprinted in
Journal of Historical Armsmaking Technology, Volume III,
1988]
Reaming the barrel begins with a bit that just touches
the tight spots and progresses with larger and larger
bits until the barrel is free of any forged surface.
These rough boring bits are a twisted square that look a
bit like a modern bolt removing tool called an "easy
out." They are turned in the barrel opposite the way
they are twisted so they don't thread themselves into
the barrel and break off. This causes the chips to be
pushed ahead of the bit and requires us to stop
frequently to blow out chips and oil the bit. If a
particular caliber has been ordered it may take even
more reaming to get out near final bore size.
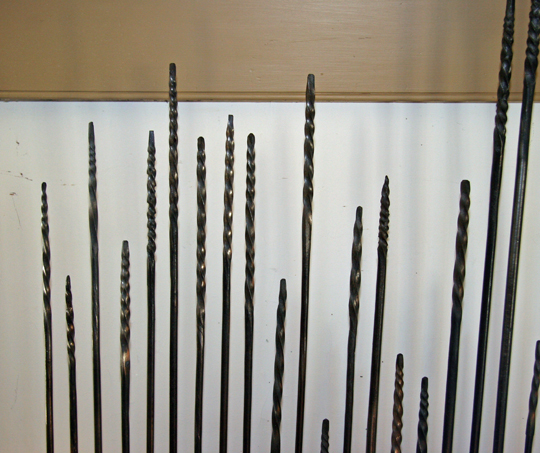
Many sizes of boring bits are required.
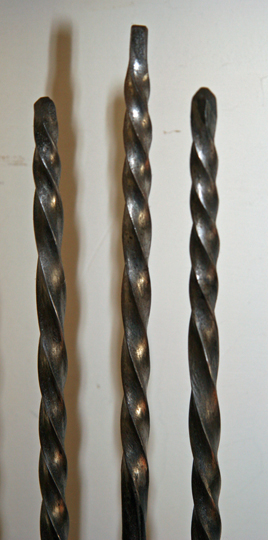
These three bits would all be turned clockwise.
The barrel
is straightened as well as possible during the reaming
by removing it from the machine and looking through the
bore. A line of light and shadow reflecting in the bore
will show the bends.
Once the barrel is close to size the final reaming is
done with s single long square bit that is backed on one
face with a thin sliver of wood -- flat on the side
against the bit and rounded to match the radius of the
barrel on the other. Only two corners cut. This bit
takes a very light cut and it is "expanded" by placing
thin paper between the bit and the wooden backing strip.
This reaming is always done from breach to muzzle and
after the final reaming the bore will have a very slight
taper due to the wear and compression of the wood.


Two views of the square reamer and its wooden backing
strip. Only the two corners opposite the hickory strip
cut. As Wallace said in the Gunsmith of Williamsburg
film, "the borings are as fine as face powder."
(top)
Next the barrel is checked for final straightness and
bent as needed. It is then filed to the desired external
taper and flare. The flats are filed in opposite pairs.
For example, the top and bottom flats first, then the
two side flats, then the other four. Once a pair is done
several rings can be filed around the barrel at
intervals to speed up matching the diameter at each
point. Rough filing can be across the flats but the
final filing is by "draw filing"-- holding the file at
90 degrees to the barrel and cutting on the pull stroke.
Slight irregularities are detected by running the file
lengthwise along the flat.
Rifling is simple because the machine controls the
process. Rifling is also done beech to muzzle so the
groves will follow the taper of the bore. I use round
bottom groves. The cutter is pulled through all seven
groves, one at a time, until it stops taking a cut , the
it is expanded by placing a thin paper shim under the
cutter. This is repeated until the desired grove depth is
reached. For a patched round ball the rifling is usually
about .012" to .014" deep in a hunting rifle.
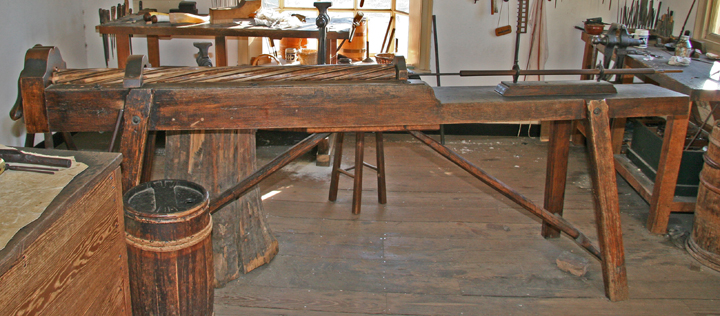
This machine was built in the 1980s. The frame is oak
but the guide and head block are sugar maple for better
wear resistance.
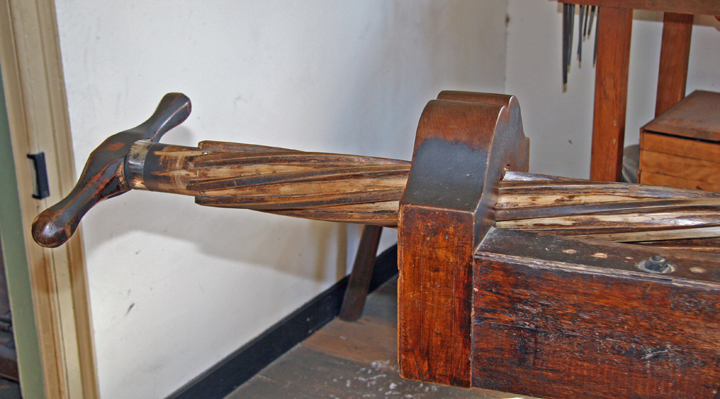
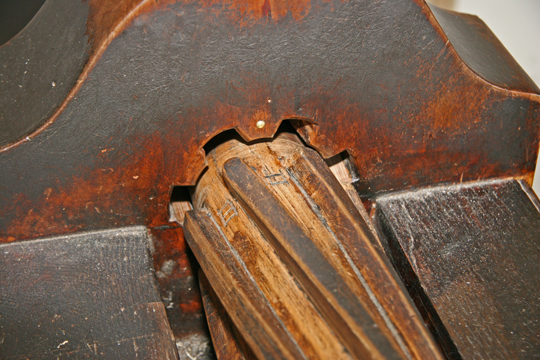
Note the numbers cut on the guide to help track which
groove to cut next.
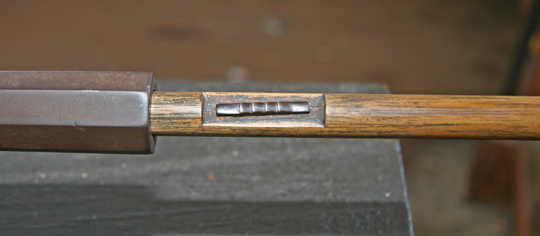
Four tooth rifling cutter inlet in a bore diameter
hickory rod.
(top)
Thread the breech, plug it, drill the touch hole and try
to blow up the barrel by proof testing it. A period
proof load (in England) for a forged wrought iron barrel
was one patched ball and an equal weight of powder.
(About what some bench shooters use every day!) In
France it was two balls and 1/2 a ball weight of powder.
I recommend buying the video The Gunsmith of
Williamsburg. It was made in 1967 and does not
have all the steps we developed later but it will show
you how a barrel is welded, reamed, and rifled.
Jim
Wright of American Pioneer Video has also produced a new
(2009) DVD that shows the forging in
more detail. Jon Laubach did the forging with the help
of his son Chris.
(top) |
